
How to Make Your Grout Look Brand New
So you’ve spent all this time cleaning and scrubbing your tile, but your grout just isn’t looking that clean? If so, you’re not alone! Many people struggle with how to keep their grout looking clean and beautiful. Fortunately, there are plenty of ways to make your grout look brand new again!
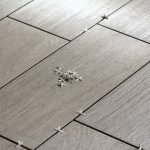
How Old Grout Loses Its Color
A lot of the time grout becomes much darker than it used to be because of water spillage. And while the dark spots look unattractive, what you really need to do is get rid of that moisture, which has caused it to darken. You can use a sponge with a bit of bleach mixed in and go over any affected areas until all the grout turns its original color again. This will fix any issue you have with the color fading on your tile.
If this doesn’t work for you, or you would rather change the color altogether, you can always paint your grout instead.
Make Your Grout Look New
Here are some of the best ideas for making your grout look brand new:
- Vinegar and Water Solution: Mix a cup of vinegar with a cup of water. Apply with a sponge or cloth to the grout. After 10 minutes, use a dry towel to wipe off any excess and let dry. Rinse with water. Clean again using your vinegar solution to remove any lingering dirt or stubborn stains from prior use. Rinse after 10 minutes and let air dry before applying sealant for best results.
- Paint: Paint your grout white by mixing four cups of wall paint into one gallon of water. Apply this mixture on the grout with a brush or roller. Let it dry completely, and then seal it with varnish so that it can’t be washed away easily.
- Floor Cleaner: Mix 1/2 cup of household ammonia in 4 gallons of hot water. Pour this solution over all areas of your flooring, including grout lines, cracks, and crevices for tough jobs. Let it sit for 5-10 minutes, and then rinse thoroughly with fresh water to make sure no residue is left behind.
- Steel Wool Pads (or similar): Scrub down dirty areas until they are clean and rinse thoroughly afterwards before drying if necessary.

